Defold
Follow these steps to quickly set up and start using Planetary Processing with your Defold game. For more detailed information on both the SDK and the server-side API, please visit our documentation.
Defold Version
We recommend using Defold's most recent release version. If you are using an older version, we recommend a minimum of 1.8.0 for a successful integration.
Create a Planetary Processing Game
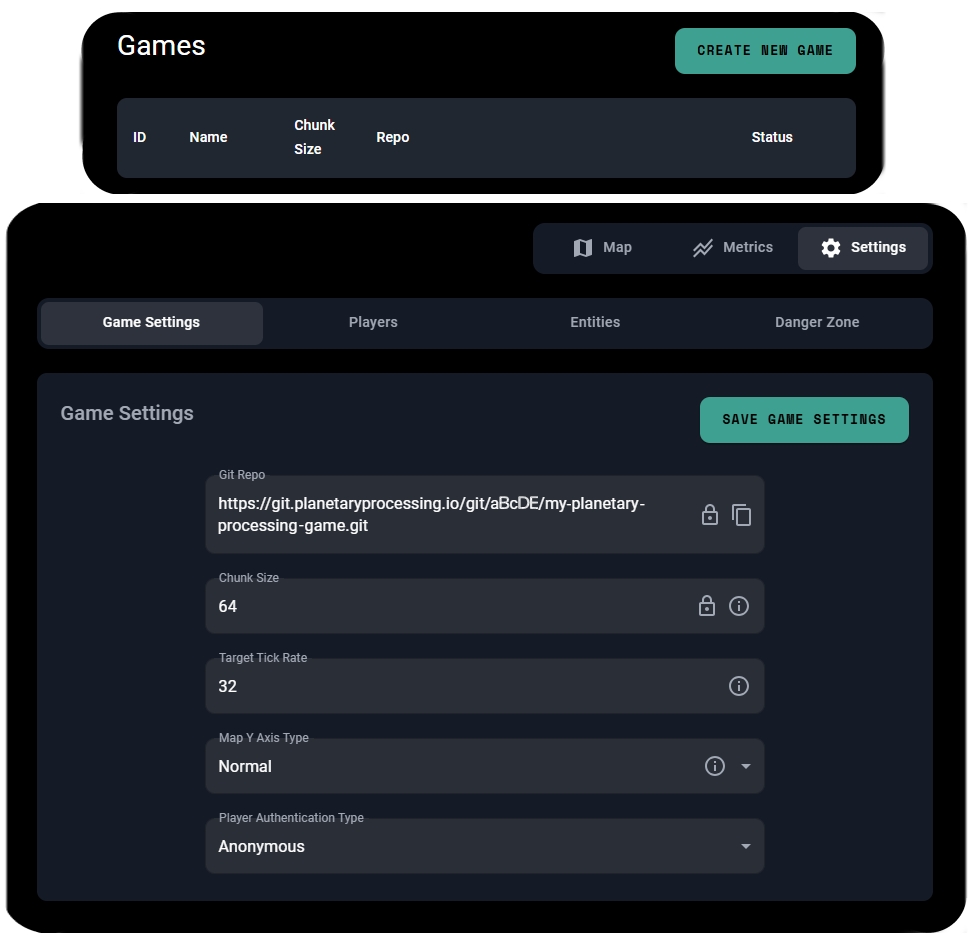
Navigate to the games section of our web panel
Click Create Game in the top right
Provide the details of your game. Upon its creation, you will be taken to your Game Dashboard.
For this quick start, we will be using Anonymous Auth, which allows players to connect without a username and password. To enable this, navigate to the settings section of your Game Dashboard and enable Anonymous Auth as the Player Authentication Type within Game Settings.
Clone your Game Repository
Clone the git repository as listed in your game dashboard - this is your Planetary Processing backend code.
Setting up your Defold project
Our Defold SDK can be used either as a dependency for a project or as an example project itself. You can use it as a template to get started quickly and familiarise yourself with a working project, since it matches the server-side demo code.
Download the zipped Defold SDK from the following url:
Unzip the folder to a location of your choice, then launch Defold.
From the Defold Editor's project selection screen, select 'Launch from Disk…'
Navigate to the folder, and select the
game.projectfile within to open the example project.
Connecting to your game server
Although most of the example project comes pre-built, it still needs to be directed to your personal game repository.
In the 'Assets' pane, expand the 'example' folder and open the
main.collectionfile.In the 'Outline' pane, expand the 'go' game object and select the
master - /p/master.script.In the 'Properties' pane, locate the 'Gameid' property input.
Enter the Game ID of your game. This is a number which can be found on your game dashboard, next to your game's name and repo link.

Test your connection
You now have everything you need to establish a basic connection between Defold and the server-side demo code.
On the Planetary Processing games web panel, select your game to enter its dashboard.
Click Actions>Start Game to start the server-side simulation.
Launch your game from Defold.
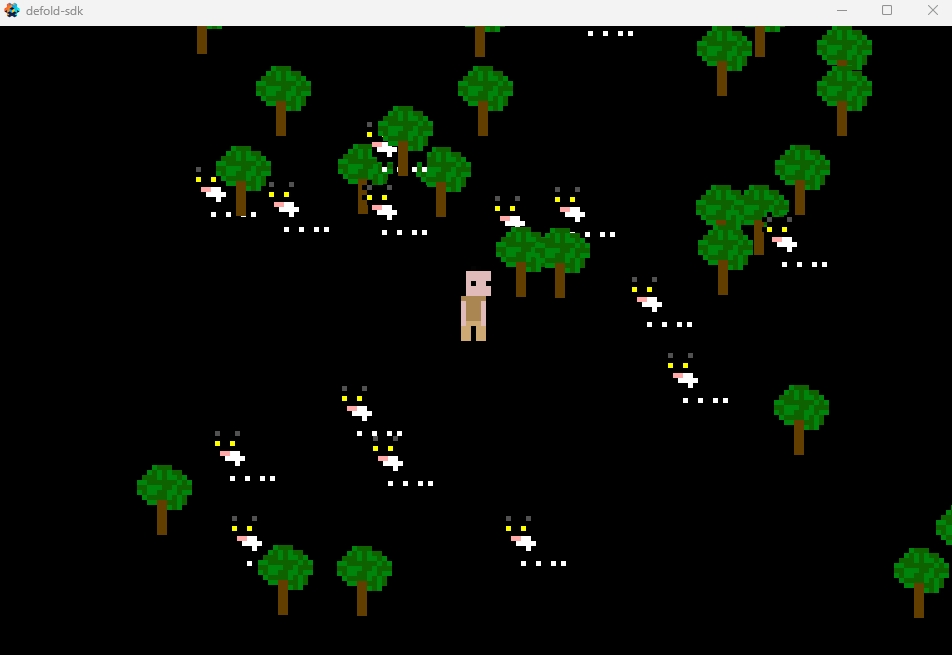
In your Defold game window, press the spacebar to join the world and start moving around.
You should now be able to see the game world and all its entities. Your Planetary Processing game dashboard map should also show that a player has joined!
The master component script
Let's have a closer look at each element of the example project, starting with the main.collection file.
Inside the collection there is a 'go' game object. This contains all the information needed to connect to your game server. Most of this information is stored within the component script file master-/pp/master.script which we used earlier to define our Game Id.
Required master.script properties
Player Url: /player
Game Id: 1234
As well as the Game Id, the master script also defines which game object is the main player character. In this case the 'Player Url' property is pointing to the 'player' game object within the main.collection.

Entity & Chunk generation (factories)
A prototype is a sort of blueprint for creating game objects. Factories then reproduce these prototypes. You will notice four factories within the main.collection's 'go' game object:
catfactory
playerfactory
treefactory
chunkfactory

The 'player' game object should not be confused with the 'player' prototype, which is used for other players in the world.
Every entity in your world has a 'Type'. These Entity Types are defined in the backend code downloaded from your game repository.
Navigate back to your cloned game repository.
Locate the 'entity' folder.
Make note of the names of the .lua files inside the 'entity' folder. These are your Entity Types.
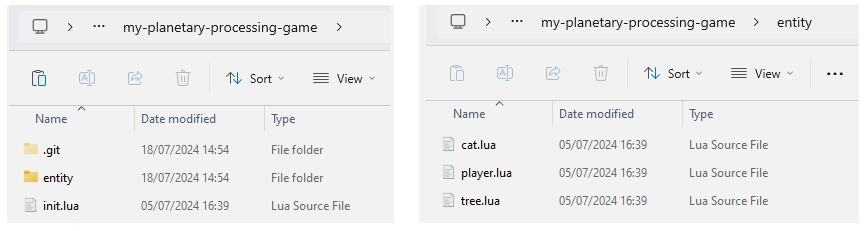
For the demo game repository, the Entity Types: cat, tree, and player are used. The factories must be prefixed by the Type of entity being generated, hence catfactory makes cat prototypes.
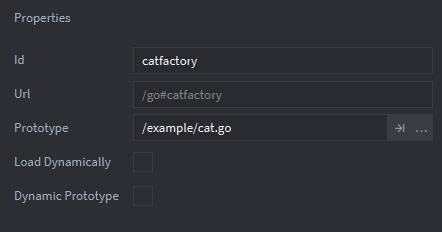
Required factory properties
Id: catfactory
Prototype: /example/cat.go
Chunk Factory
If you wish to store data in game world chunks, you can add chunk objects to your game as prototypes in the same way as entities. These chunk objects will be spawned into the world as invisible object at the origin of their respective chunks, and will load and unload as the player moves around the world.
Chunk objects are optional and you can create a game without them if you wish.
Like entities, the spawning Chunk objects in the world requires a factory and prototype. There is only one type of chunk, so the factory is simply called chunkfactory.
Entities (prototypes)
Prototypes have a blue icon in the 'Assets' pane. Opening up the cat.go prototype, we can see that it is made up of a game object with two components. The component script entity-/pp/entity.script defines which prototypes are entities for your Planetary Processing game server. The 'sprite' component tells it what image to use.
Required prototype components
entity-/pp/entity.script

Chunk Prototype
Chunk prototypes are similar to other entity prototypes, but more simple. There is no need for a sprite, because a chunk object should be invisible in the world and a chunk is static, so there is no need to update its position from the server.

The main player character
The main player character is represented by the 'player' game object in main.collection. It also requires an entity component script to exist in the game world. However, because there is only ever one main player character per game client, it does not have an Entity Type nor does it need a factory.
Required main player character game object components:
entity-/pp/entity.script
test-/example/player.script
In the example project, the 'player' object also has the player.script component file. This script is doing two things: handling the player's movement inputs and establishing the connection to the game server.

Messaging the game server
In the example project, the 'player' object establishes the connection when the game starts up using the init() function. It posts a message to the game object with the master.script ("/go"), telling it to start a connection ("pp_init") and providing any username/password credentials ({}).
But as seen earlier, we can delay the player actually joining the world until we press space, which sends another message to the master object with the hash "pp_join".
Once authorised and joined, messages can be sent to and from the game server. The example project sends messages to the game server to handle player movement.
Each time an entity on the game server moves or changes, a message is sent to its corresponding game object, with the ID hash("pp_update"). Entities can interpret these position messages automatically, if the 'Use Server Position' property is enabled in their entity-/pp/entity.script. For more complex data, a custom script can be used.
Project Settings
In the 'Assets' pane, we can see that the example project uses three libraries (with puzzle piece symbols) 'builtins', 'orthographic', and 'pb'.
The 'builtins' library is part of every new Defold project by default.
The example project uses the 'orthographic' library for ease of following the player with the orthographic camera script
camera-/orthographic/camera.scriptinmain.collection.The 'pb' is the Defold Protobuf library, which the Planetary Processing Defold SDK actively depends on.
The 'websocket' is the Defold Websocket library, which the Planetary Processing Defold SDK actively depends on.
A new Defold project would require the 'pb' and 'websocket' libraries, as well as the PP Defold SDK itself, which would act as a dependency 'pp'. Dependencies can be viewed and edited.
In the 'Assets' pane, open the
game.projectfile.Find the 'Dependencies' setting in the 'Project' tab, in the main editor window.
The example project has the three external dependencies:
For a new Defold project, the Planetary Processing SDK would have to be added:

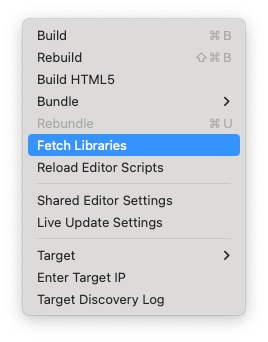
Whenever a new dependency is added, it must be loaded by selecting 'Fetch Libraries' from the 'Project' tab, in the topbar.
The Defold Websocket library has additional configuration settings. Check there is a 'Websocket' tab in your game.project file, with the 'Debug' and 'Socket Timeout' settings.

If these settings are missing, edit your game.project file in a text editor and add the options to it manually.
Editing your backend code
Using the repo we cloned earlier you can edit the behaviour of entities by changing their Lua file within the 'entity' directory.
You can also change how many and what entities are spawned in the init.lua file.
We recommend experimenting here to get a sense of what you can do with Planetary Processing. When you add or change entities, make sure your server-side changes match up with your game engine client.
Push your Planetary Processing backend code to the game repository
After configuring your game entities and logic, push your changes to the game repository:
Deploy Latest Version in the Web UI
Go back to your game dashboard in our web panel
From the actions menu in the top right, stop the game if it's running.
Select "Deploy Latest Version" - this will roll out your updated server-side code.
Play and update your game
Start up your game again in Defold and in the web panel, to see the changes you have made!
If you want to learn more about updating your server-side code, check out our server-side tutorial video: https://www.youtube.com/watch?v=QYWtedo1kr4&list=PLW5OY4K85Qhn7lwZeSPVZXH_Lg5IwhjNC
Troubleshooting
If you have encountered any issues, we have a premade demo of this guide: https://drive.google.com/drive/folders/1XonHBoVWp5ozIiFWrbMhAp669dhq_WSX?usp=drive_link If you have further questions, please get in touch on our Discord.
Last updated